Manage applications
The Prophix Cloud Ops Team is responsible for adding and managing the Prophix One applications that appear in Portal. Once added to Portal, an application and its instances can be assigned to users by the Portal admins.
Note: The procedures below do not install or configure Prophix One applications or their instances in your environment; those are separate activities managed by the Prophix Cloud Ops Team.
As a Portal admin, you can add and manage custom (non-Prophix One) applications to Portal. For example, web search engines.
Open Application Management
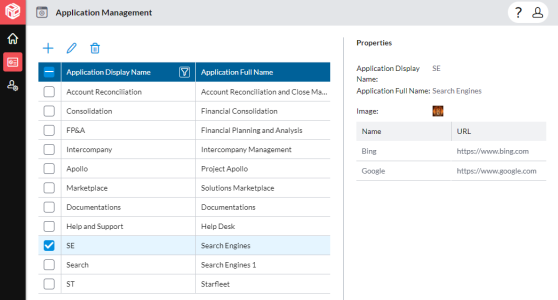
You perform all the user management functions from Application Management.
-
In the left-hand panel, click Account Management > Application Management.

Add custom applications
A custom application is an application created by a Portal admin and that can be assigned to any user.
You add custom applications to Prophix One Home one at a time.
Note: Prophix One Applications and their associated instances can only be added by the Prophix Cloud Ops Team. However, you can add your own custom applications using the steps below.
-
In Application Management, click .
The Add Properties dialog appears.
-
Application Display Name: A briefer version of the name suitable for shorter spaces in various areas in Portal.
Example: In the User Management page's Assign Application dialog; in the Assigned Apps tab's Application column.
- Application Full Name: The "proper" name that appears in the application's tile in Prophix One Home, as well as other areas in Portal.
- Image: Select the image that you want for the application's icon (appears in the application's tile in Prophix One Home.
To replace the default icon with your chosen image, click Upload an Image, select an image file, and click Open.
Tip: Image files must be either JPG or PNG format and no bigger than 256 kb.
To remove your image and return the default icon, click Remove the Image.
- For each instance of the application, do the following:
- Click .
- Name: Type the name of the instance link as you want it to appear to users. For example, Google.
- URL: Type the URL for the link. For example, https://www.google.com/.
Note: To delete one or more URLs, select the row(s) and click .
- Click Save.
Tip: You assign applications to users in User Management.
Edit applications
You can change the details of an application in Portal, such as the name of an application instance.
Note: In the case of Prophix One applications, the only value that you can edit is Name, in the table of instances.
- In Application Management, select the row of the application you want to edit.
-
Click .
The Edit Properties dialog appears with all details available for editing.
-
Make your changes.
-
Click Save.
Delete applications
Use the following procedure to delete one or more non-Prophix One applications from Portal.
Deleting an application removes it from all pages and dialogs where applications are listed, including the Assigned Apps tab of users.
Note: This procedure does not uninstall or in any way affect Prophix One applications in your IT environment.
-
In Application Management, select the row(s) of the application(s) you want to remove.
Tip: If is disabled, this indicates that a Prophix One application is selected.
- Click .
- Confirm your choice.